This tutorial covers how to set up a skeletal mesh in Blender and generate an associated cloth physics file using Nvidia’s APEX Cloth tool. It assumes you have a working knowledge of Blender and can already get a functioning skeletal mesh imported into the DevKit.
For a more information on Nvidia’s Clothing Tool, the documentation can be found here: Clothing Tool
Requirements[]
- Blender (Maya and 3dsMax have their own plugins which aren't covered here)
- You must be a part of NVIDIA’s developer program to download the APEX tools. If you aren’t already, you can sign up for the program here: Nvidia Developer Program
- The APEX SDK can be downloaded here: APEX SDK
Blender[]
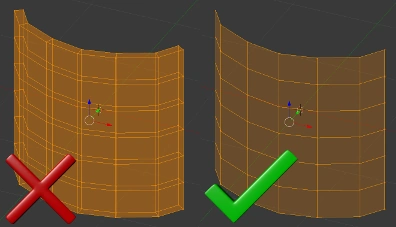
The cloth mesh should only be one layer of vertices.
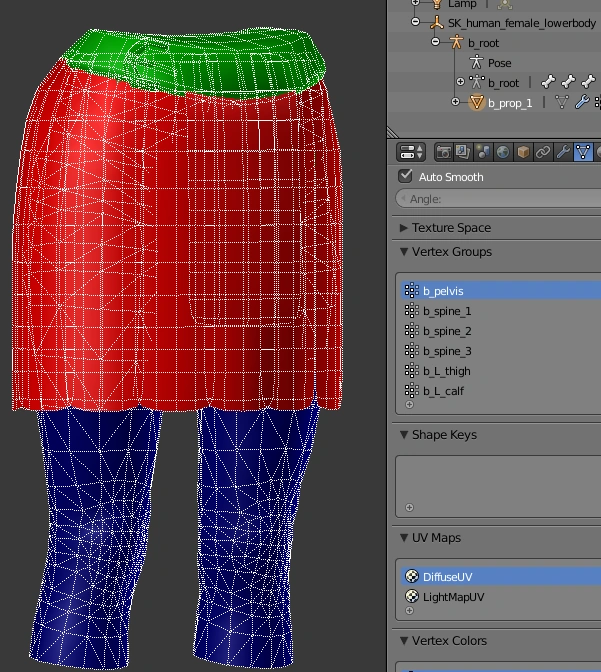
Model and UV unwrap your mesh as normal. Assign a different material to the cloth portion of your mesh. The same material can be assigned to both slots in Unreal but a second material slot makes it easy to isolate those vertices in the Clothing Tool.
- Keep the cloth portion of the mesh to a single layer of vertices (no depth).
- When weight painting the mesh, all vertices that you'll be turning into cloth should be given full weight (1.0/red) to a single bone. Remember which bone you used as you’ll need it later.
Note: Join all meshes together (shift select and ctrl+J) before exporting your mesh. Although Unreal will recognize it if you’re using the same material on multiple meshes, the clothing tool will treat them as different materials. This disconnect will cause a mess when you try to apply the cloth solution in Unreal.
NVIDIA Clothing Tool[]
Open and run the Nvidia clothing tool. After extracting the contents of your download, the program you’re looking for is:
bin\vc10win32-PhysX_3.3\ClothingToolPROFILE.exe
Clothing tool controls:[]
- rotate: alt - right mouse button
- pan: alt - middle mouse button
- zoom: alt - left mouse button
- add vertex paint: left click
- remove vertex paint: right click
Max Distance[]
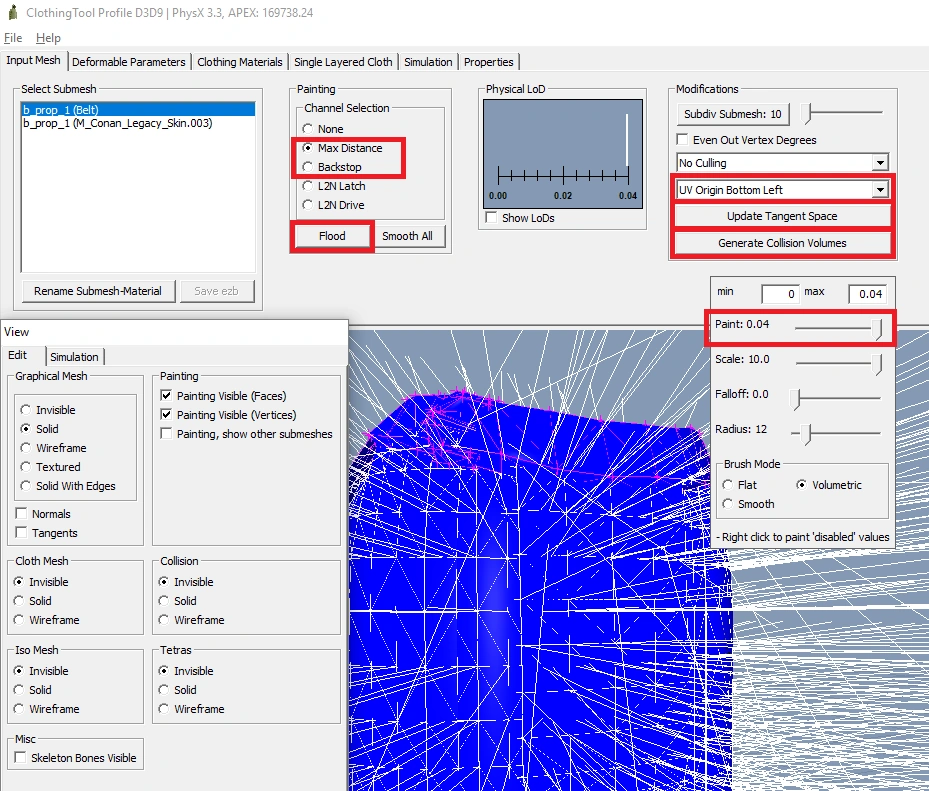
This determines which parts of the mesh the cloth physics are applied to. All connected vertices of a mesh can't have cloth applied to them or it will just fall down through the ground. White denotes full strength while purple indicates none.
- In "Select Submesh", select only the material your cloth vertices are assigned to
- Make sure the "Painting, show other submeshes" is unchecked
- Increase the Paint slider to the max
- Flood the mesh
- Right click on the top loop of vertices to remove cloth physics from them. (They should turn purple)
Backstop[]
Backstop is the amount the cloth is allowed to travel inward. In the case of clothing, since you don't want it to move in towards the body, you can just Flood the mesh with the Scale set to 0.1.
Mesh setup[]
- To get proper UVs from Blender set the drop down list to: UV Origin Bottom Left
- Click on "Generate Tangent Space"
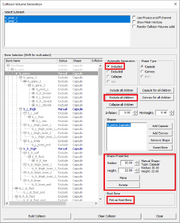
Generate Collision Volumes[]
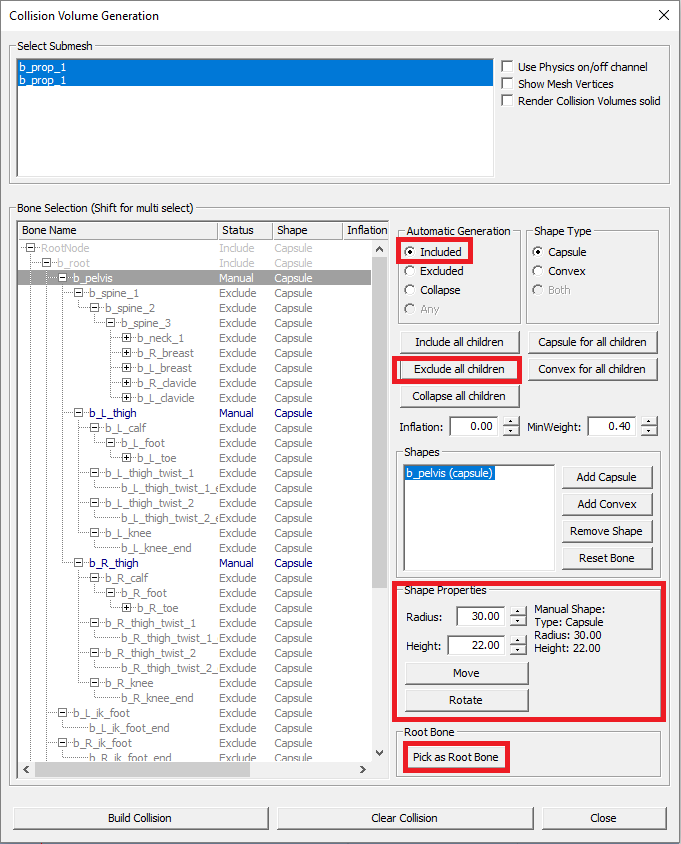
While the backstop will prevent the cloth from traveling inward from its current position, the cloth won't be affected by anything else. To solve this, the collision volumes simulate other parts of your mesh (e.g. the legs) colliding with the cloth.
- Choose your RootNode and click on “Exclude all children.”
- Then clicking on the bones you want to simulate choose "Included" from the Automatic Generation box
- You will most likely have to adjust the auto-generated shape to fit your mesh. (This can take a lot tweaking moving back and forth between the simulation.)
Important: Select the bone the cloth was assigned to in Blender and click on “Pick as Root Bone”
- Finally click on Build Collision
Saving[]
- Click the "Start Simulation" button found on the Single Layered Cloth tab.
- You can change the direction and velocity of the wind to get an idea how the collision is working.
- Return to generate collisions if it needs some more adjustments.
- When you're satisfied, hit the "Save Selected" button on the Simulation tab and save it out as an
Apex Binary Asset (*.apb)file.
Conan Exiles DevKit[]

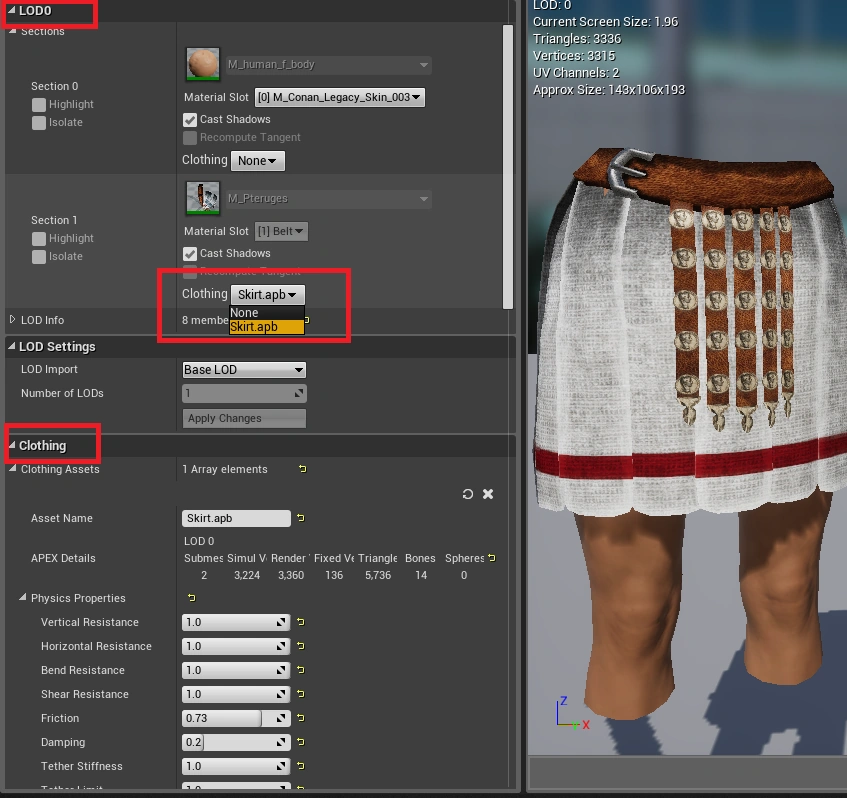
The APB file is not imported like other assets. Rather it is loaded from within your skeletal mesh.
- Inside your skeletal mesh's Clothing property, click on "Add APEX Clothing File."
- Find and load your saved APB.
- Under LOD0, find the material associated with the cloth vertices and select your APB file from the drop down menu next to clothing.