Mods for Conan Exiles
The mod devkit is a work in progress and there are many rough edges still. (This also goes for the documentation!) Some things to be aware of:
- You have to restart it when you want to work on a new mod. (This might not get fixed any time soon, since flushing/reloading assets seems problematic.)
- Renaming mods is not trivial, so choose good unique names.
- The feedback for users when joining a server that has mods is very bare bones right now. It currently requires people to look for the mods manually, but this will be improved.
We will be focusing on fixing these issues and generally improving the modding experience over the coming weeks. Thanks for your patience!
Mods – Short Version
A mod in Conan Exiles is a single .pak (archive) file containing modified versions of game assets, and optionally new assets.
To create mods, get the devkit from the Epic Games Launcher, do your changes and build the mod to generate a mod file. You can either distribute the mod through the Steam Workshop by uploading it from the DevKit, or simply share the file with your friends directly.
Installing Mods
The easiest way to install mods is to subscribe to them on the Steam Workshop. Once they are downloaded you can find them in the "Mods" menu from the Main Menu in game. You can also use mods that you get outside of the Steam Workshop - put the mod .pak file in "<SteamLibrary>\steamapps\common\Conan Exiles\ConanSandbox\Mods" and it will be available in the in-game mods menu.
Note: You have to restart the game before changes to the selected mod list has any effect. The ingame gui doesn't make this very clear right now.
Installing mods on a dedicated server
Note: The process for running mods outside single player is very crude and manual right now. We are working on making this more user friendly.
Client side: To join a server with mods, you must first have the same mods the server is running, with the same load order. When joining a server, you will get a message box telling you which mods you are missing. You cannot connect to the server unless you have those mods installed and activated.
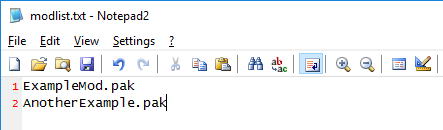
Server side: To start a server with mods you put the mod files (<mod name>.pak) in "<dedicated server folder>/ConanSandbox/Mods/" and add a text file with the file names of those .pak files, one per line like this:
Instead of creating modlist.txt manually you can also select the mods you want in your game client, then copy the file from "<game folder>/ConanSandbox/Mods/modlist.txt" to "<dedicated server folder>/ConanSandbox/Mods/modlist.txt". When clients try to connect to the server, the game will first check to make sure the clients have the same mods as the server selected. If they don't they won't be able to connect.
DevKit
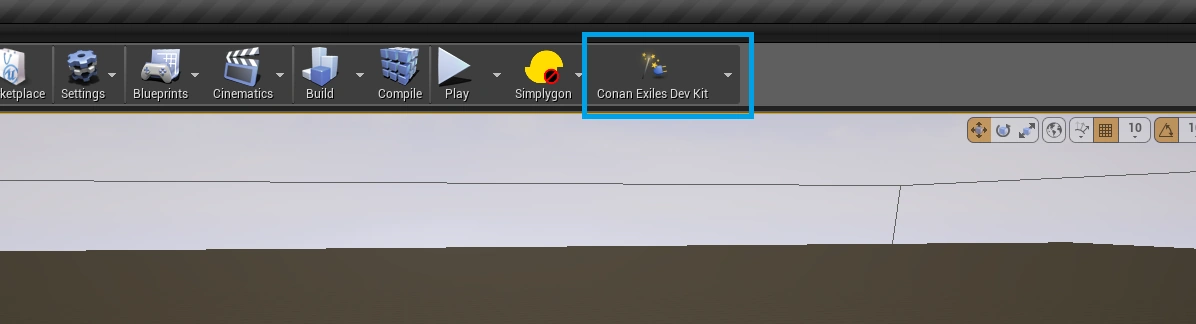
Download and run the DevKit from the Epic Games Launcher (https://www.unrealengine.com/download), under the "Modding" tab. The DevKit is a modified version of the Unreal Engine editor and will let you do (almost) everything the developers can do except C++ code changes.
NOTE: You should install the DevKit with the shortest path possible. The build process will fail if the paths are too long. So to prevent this error, you should install under C:/ConanExilesDevKit, rather than C:/Program Files (x86)/MyStuff/Games/ConanExiles/ConanExilesDevKit.
Discord
Community members have set up a discord for exiles modding: https://discord.gg/66jB9dN. Please read #rules when you join!
YouTube
Usage
The first time you launch the DevKit it will open with a default mod selected. You can use this to play around and see how things work, but before you start working on something you want to use or distribute to other people you should create a new mod with a unique name. See the section "Conan DevKit menu" --> "Create new mod" below for more details.
Note: The folders in "<devkit folder>/Games/ConanSandbox/Mods/" are used by the DevKit to edit the mod, so deleting a folder here means you can no longer edit that mod. These are the folders you want to have backups of!
Editing existing game assets: Modify assets normally. Note that you can't rename, move or delete existing game assets.
To create new assets: New assets can only be added in "Content/Mods/<mod name>".
Use "Play in current viewport" to test with the mod content loaded.
Build errors
When building a mod, Unreal will cook each asset.This process will fail if the assets contains certain errors (like a Blueprint compiler error). If the build fails, check the output log for the lines saying something like this (should be near the bottom):
LogModManager: LogInit: Display: Failure - 7 error(s), 10 warning(s)
LogModManager: ModCook completed with code 1
LogModManager:Error: Error cooking. Cook process returned: 1
In this example there are 7 errors that caused the build to fail. The log will say what the errors were in more detail further up. Fix these, and try to build again!
Sharing mods
When you have a mod you want to share with others, you must first Build the mod. Then you can either upload the mod to the Steam Workshop or share the generated .pak file directly with your friends.
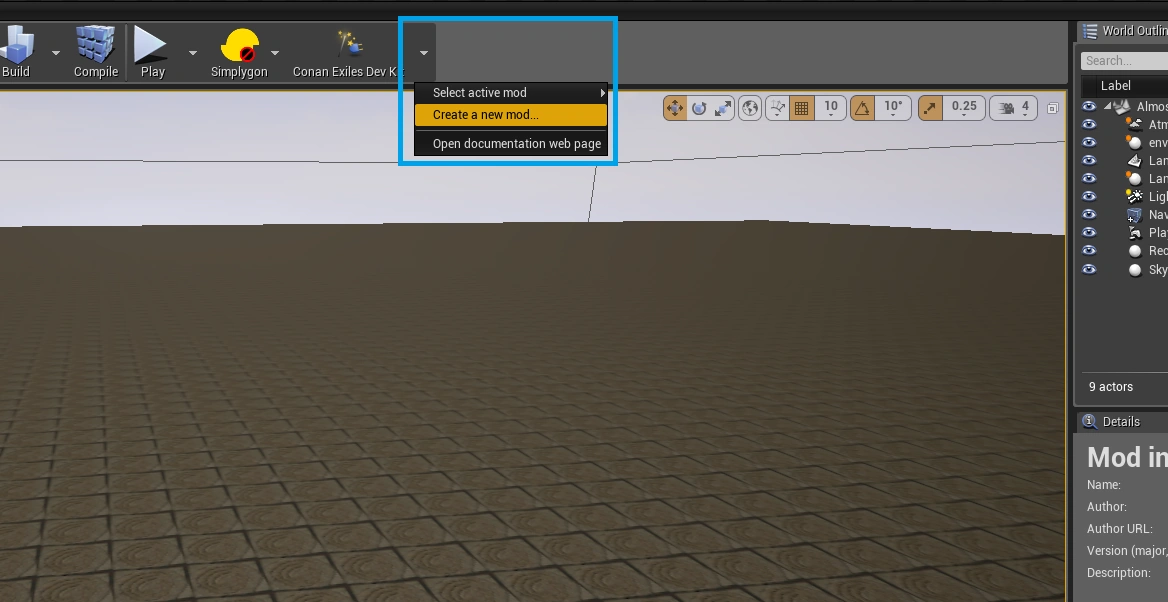
- Select active mod: Switch which mod you are currently editing. This will restart the editor!
- Create new mod: Use this to .. create a new mod.
- The name you enter here will be used to create a folder (<devkit folder>/Games/ConanSandbox/Content/Mods/<mod name>).
- Any assets you add will end up here, so make sure you choose a unique name to avoid conflicts with other mods. (Especially until we figure out a safe way to rename mods >.<)
- You can change the display name of the mod to something more user friendly before building/uploading to Steam.
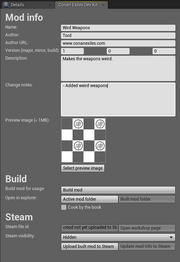
DevKit window
- Name: Name of mod as it appears in the in-game mod menu and in the Steam Workshop.
- The name can't be empty and must be less than 128 characters long.
- Author: Name shown as author in the in-game mod menu.
- Author URL: Shown in the in-game mod menu.
- Version major, minor, build: Show in the in-game mod menu.
- Description: Shown in the in-game mod menu and on the Steam Workshop.
- Max length is 8000 characters.
- Change notes: Shown in Change Notes on the Steam Workshop page.
- Preview image: A .png image that must be less than 1MB. Used on the Steam Workshop page.
- Build mod: This will cook the mod and package it so it can be used/uploaded to Steam.
- The build can take a while (up to an hour).
- The generated .pak file is the only file needed to load the mod. You can share this both with and without Steam.
- Open in explorer:
- Active mod folder: Opens the local folder of the active mod that the DevKit uses when editing the mod.
- Built mod folder: Opens the folder where the .pak file generated from a build is located.
- Cook by the book: By default, the DevKit will find and cook each asset modified in the currently active mod individually. If "Cook by the book" is checked, it will do a full dependency based cook (but force include all new assets added by the mod) and then pack up cooked versions of the mod's assets. The normal cook will almost always be much faster.
- Steam file ID: The Steam Workshop item ID used to identify the mod in the Workshop.
- This is automatically managed when uploading to Steam.
- Open workshop page: Opens a browser window with the Workshop page of the current mod. It might take a few seconds before the page is updated after uploading.
- Steam visibility: Visibility of the mod in the Steam Workshop.
- Public: Visible to everyone.
- Friends-only: Visible to you, your friends and admins.
- Hidden: Visible to you, admins and users marked as creator.
- Upload to Steam button: Uploads the current mod to Steam. You must first have a build of the mod.
- Update mod info to Steam button: This will only update the info on the Steam page for your mod with the current state of all the textboxes and preview image. Allows you to update the preview image on Steam and Steam visibility without uploading the whole mod.
Steam
You can upload a mod to Steam through the DevKit so others can subscribe to the mod. Note that changes made to the mod on the Steam Workshop website will NOT be reflected in the DevKit. This means that changes to name, description, visibility or preview image will be overridden the next time you upload your mod from the DevKit, so make sure you update these field only through the DevKit. Changes to the other fields will not be affected.
Creating an example mod
- Open the DevKit and go to the DevKit drop down menu. Select "Create a new mod..." and you will be asked to enter a name for the mod.

Create new mod
- Enter a name and click "Create". Once the editor has restarted you can begin creating the mod.
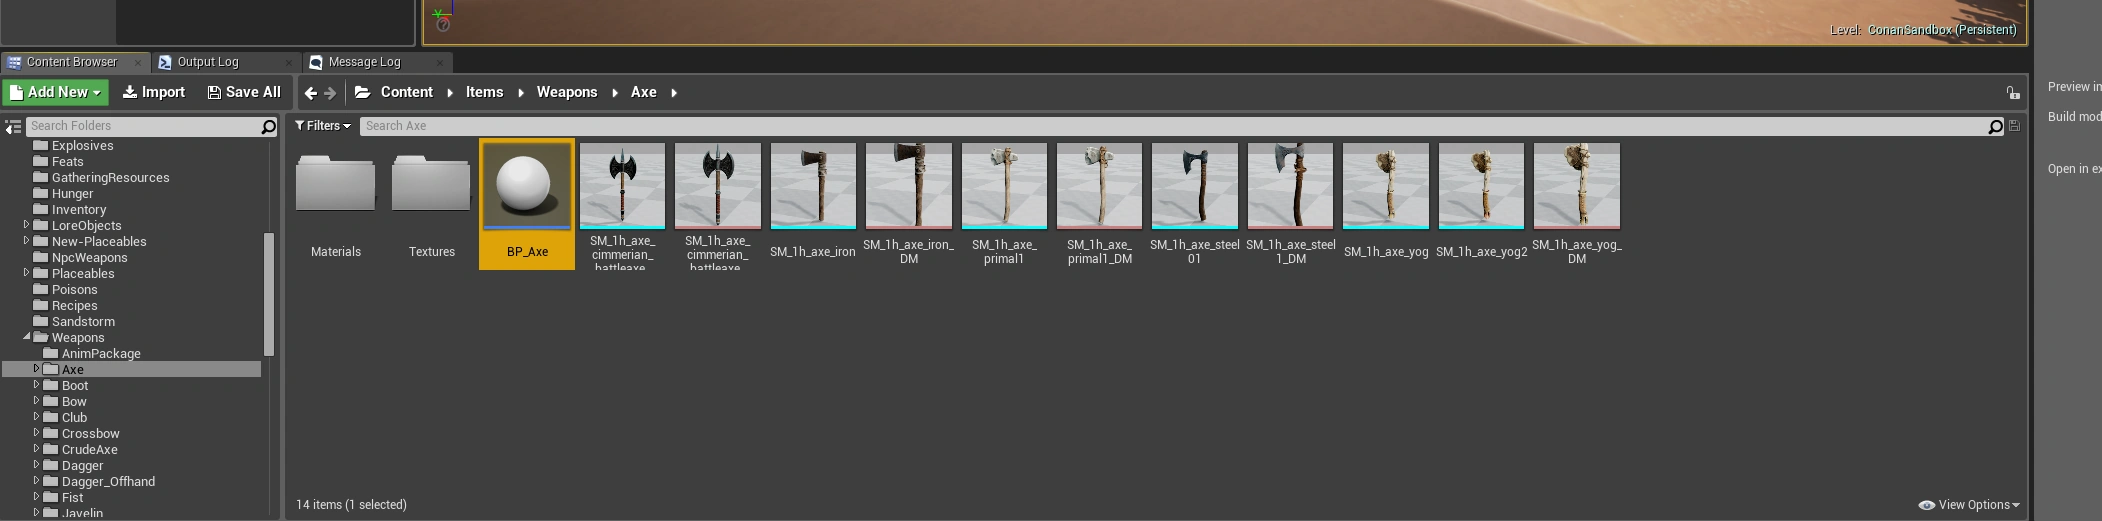
- In the content folder go to Items/Weapons/Axe and open BP_Axe.

Edit Items/Weapons/BP_Axe
- Select the 'StaticWeaponMesh' in the Components window.

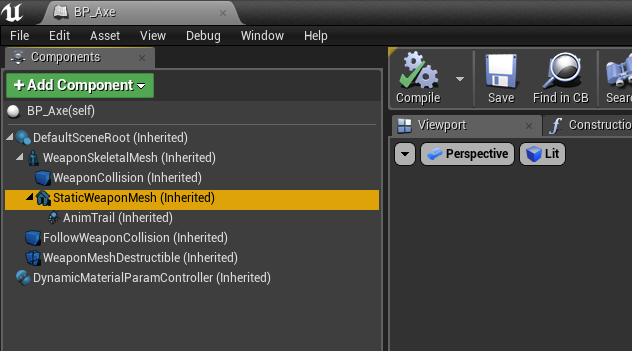
Select StaticWeaponMesh
- Change the values of the Scale property of the Transform in the Details window.
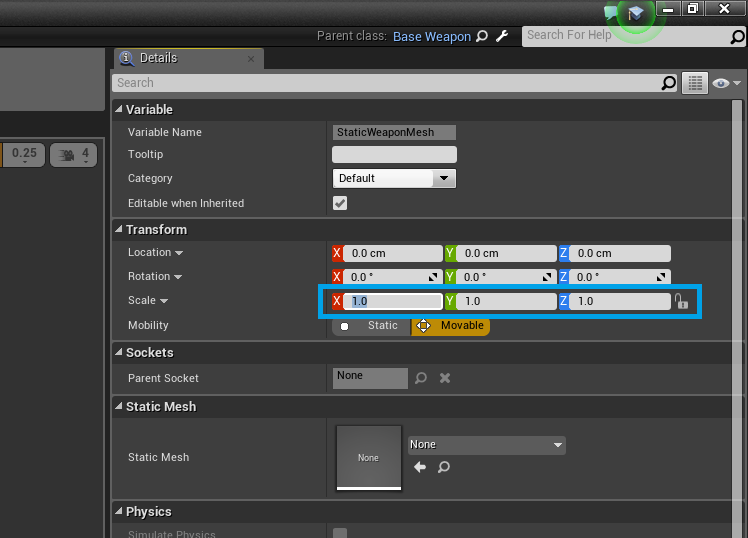
Change the scale properties
- Hit 'Compile' and 'Save' for that Blueprint. Repeat for other items (like 'Items/Weapons/Torch', 'Items/Weapons/RepairHammer', 'Items/Weapons/Pickaxe').
- To test your mod you can use 'Play' from the main window.

Use 'Play in selected viewport'
- Once you are done with your mod, go to the DevKit panel. See the "DevKit window" section for details on the different fields and buttons.
Go to DevKit panel
- Enter the details and select a preview image.
- Click the "Build mod" button to build the mod. This process can take a while depending on how many assets are changed in the mod.
- Once the build is done, you can either click "Upload mod to Steam" or go to the 'Built mod folder' and share the 'YourModName.pak' file directly.


Under the hood
The devkit is built from Funcom's modified version of Unreal Engine 4.12.5. The main changes specific to the devkit are
- It (transparently to the editor) redirects reads/writes of assets/maps to the mod's folder on disk:
- Reads/writes in <content>/Mods/<active mod name>/* are remapped to <content>/Mods/<active mod name>/Local/*
- Reads/writes anywhere else in <content>/Mods/* are blocked.
- Reads/writes anywhere else under /Content are redirected to <content>/Mods/<active mod name>/Content, with reads falling back to the original path if nothing is found in the mod.
- It tries to prevent adding/moving/deleting/renaming anything outside /Content/Mods/<active mod name>/
- It prevents opening or exporting assets Funcom bought from the marketplace (for licensing reasons).
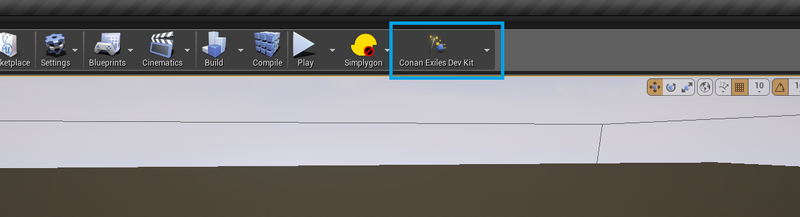
- It adds the devkit toolbar button and menu.